Attention: Sometimes we receive a commission when you make a purchase through the links on our site.
I am going to be completely honest, with full disclosure, I have never hatched fertilized eggs before. The idea has always been intriguing to me and I think it would be a fun project to do with my kids. After doing the research for this article, I think it will definitely be on the to do list next spring.
To make a homemade incubator, you need a way to regulate the temperature and the humidity and also a way to turn the eggs. The basic principle is that you put a light and a bowl of water inside of a container and then add your fertilized eggs. How it looks comes down to personal preference.

Egg incubators range from very simple to fully automatic. I will cover a variety of different ways to make a homemade incubator for your backyard chickens. If you read through this article and decide that you would rather just buy something, I do not blame you and no judgement here!
Hatching Eggs
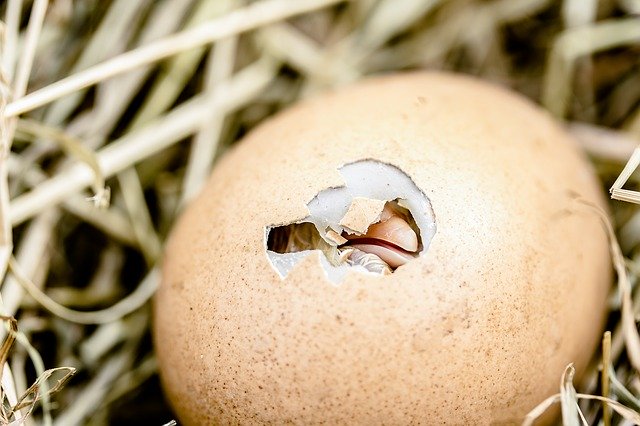
Hatching chicken eggs is usually a 21 day process.
You need your incubator to be able to reach and also maintain temperatures ranging from 97 degrees to roughly 101 degrees. A temperature that is too low or too high will result in chicks being sick when hatching.
The eggs need between 50-55 percent humidity for the first 18 days and then the last three days it needs to be 65 percent or higher. Humidity helps the air cell to grow appropriately. This cell provides the air for the chick to take its first breath. If the air cell is too big, the chick can dry out before hatching.
Turning the eggs is important. It makes it so the embryo from fusing to the inner membrane. After the first day, the eggs will need to be turned three times a day. Do this until day 18 and then leave them undisturbed for the last three days.
Things To Remember
- Some chicks take longer than others. Don’t worry if it takes longer than 21 days.
- Leave the incubator closed for the entire first day
- After 18 days, leave the incubator closed as well.
- Fix any temperature swings. There is not need to panic but make sure you adjust it.
Building A Homemade Incubator
The steps below generic steps and are not intended to provide specific installation techniques or safety procedures. Anytime you are working with electricity, make sure you follow the manufacture’s warnings and recommended uses. If you are not 100% in your actions, call a licensed electrician to take care of it for you.
Materials Needed
- Container to be the incubator (cooler, box, etc.)
- Light socket and bulb
- Thermometer (optional thermostat is a nice upgrade)
- Optional fan (an old computer fan works great)
- Optional window (glass from a picture frame is perfect)
- Container to hold water
- Padding for bottom of incubator
Steps
- Cut any holes required (for light socket, wires for fan, etc.)
- Install all electrical. If doing a fan, install 120v plug. Attach thermostat, wire light socket, light bulb, etc.
- Install glass for viewing window, if you decided to do one (use heavy duty tape, glue, etc.).
- Put padding on bottom of the incubator.
- Place container for water in the incubator (under the light bulb is a common spot).
- Add water to container. Sponges are commonly used as well.
- Turn on the light bulb and make sure it reaches desired temperature.
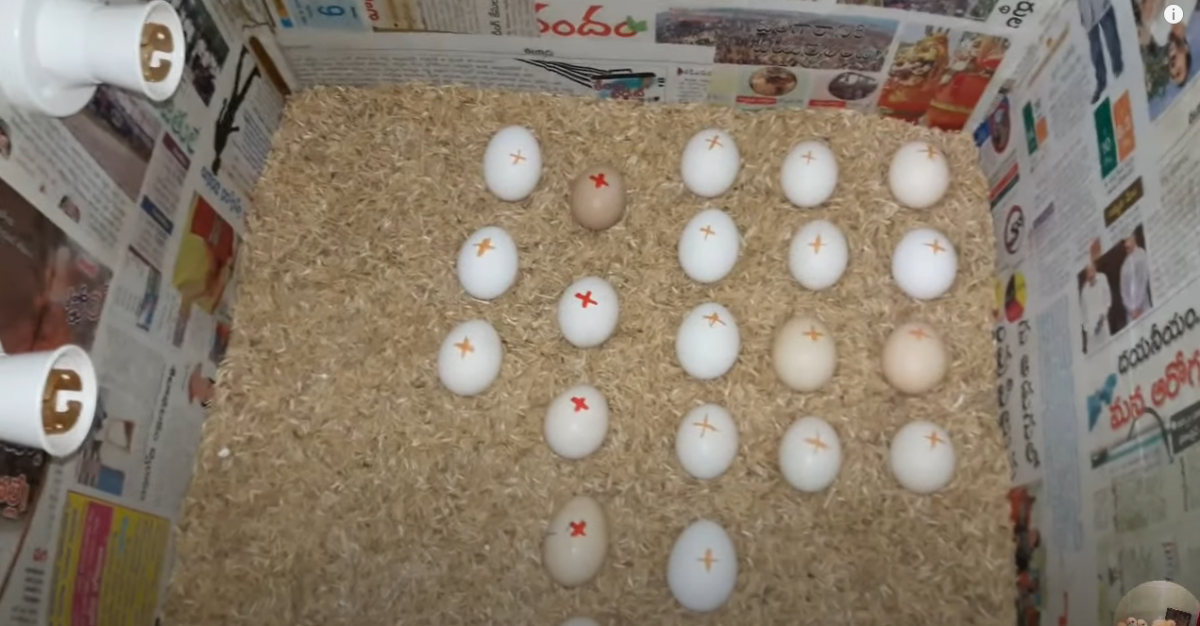
- Add eggs (mark one side with an “X” and the other with an “O” to use as a reference when turning the eggs
Homemade vs. Store Bought
There are some pro’s and some con’s to making your own incubator vs. buying one from the store. It really depends on your budget and your goals for the project.
Pros
- Cost – building your own homemade incubator can be a lot cheaper than buying a commercially made one. Especially when you consider you only use it for three weeks or so.
- Recycling – sometimes there is a sweet satisfaction knowing you took materials that were destined for the landfill and make some useful out of them.
Cons
- Controls – it can be hard to control the temperature and the humidity in a basic homemade incubator.
- Hatch Rates – success rates can be lower in a homemade incubator.
So now on to the good stuff. You have decided to build a homemade incubator for backyard chickens. Let the YouTube University lessons begin!
In A Bottle
This tutorial shows how to build an incubator in a bottle. These five gallon water bottles can be easy to come by. You might even have one laying around the house. Since the bottle is clear, kids and pets will get a kick being able to check in on their eggs anytime they wish.
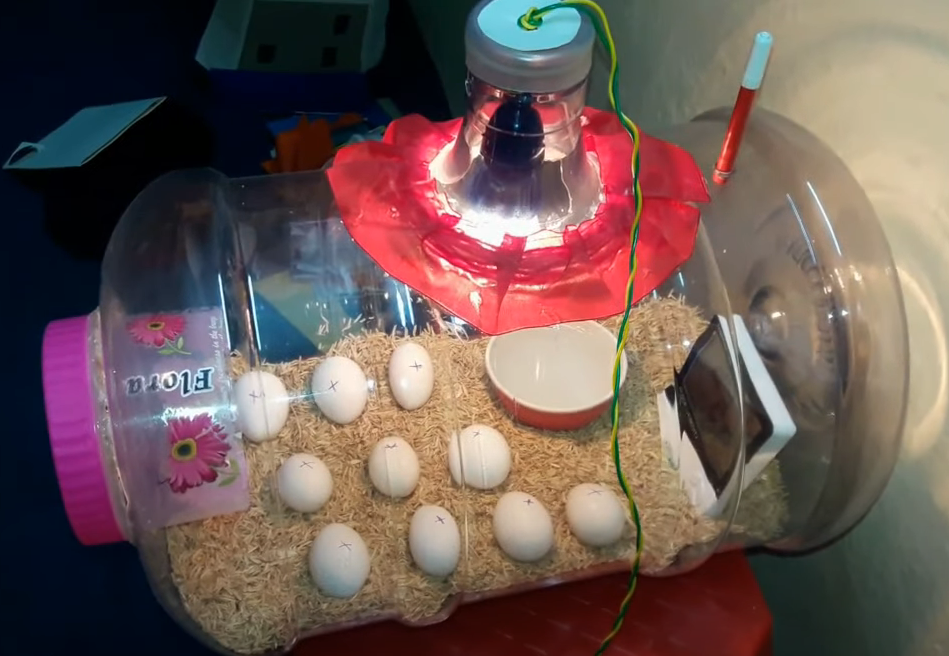
Opinion: This is not the prettiest incubator I have seen. It is definitely functional. Cutting plastic is fairly easy to do so you do not need a garage full of tools to make it. Plastic is a good insulator for heat so that will help the incubator maintain heat.
With A Turner
This is a great tutorial. He built an incubator that has an automatic egg turner in it. I always think automation is a perfect solution but those of us with a super busy schedule. You need to double check that the automation is still working but they are a great time savings.
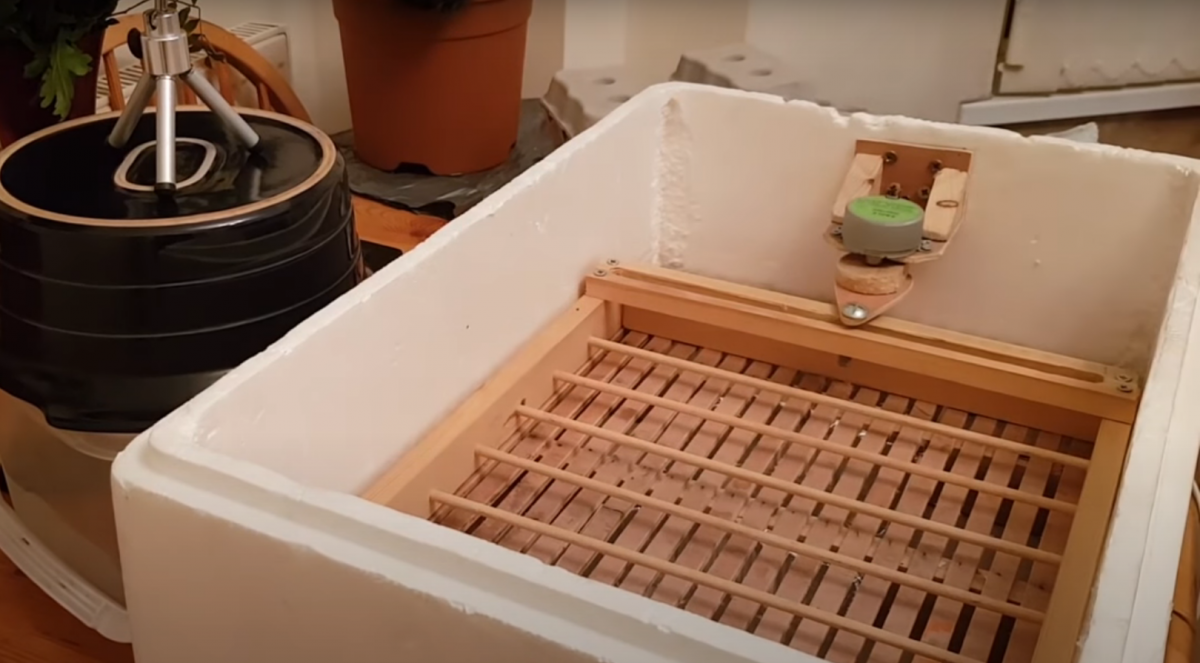
Opinion: Out of all the basic homemade incubators I looked at, I like this one the best. To get the egg turning mechanism to work, it looks like you have to do a little construction on your own. He describes the wood pieces and how they work but not how to physically make them. Which is fine. They look easy enough to put together. Having a fan to circulate air is a big plus.
If your goal is more to hatch eggs and than to have a fun project with the kids, this is the one to do.
Easy Peasy
This tutorial if for a very simple homemade incubator. I wish they would have picked a different soundtrack to go with it, but it works. Watching this tutorial, you will realize you probably have everything you need at home all ready to make this homemade incubator.
Opinion: Build this incubator if you are wanting to dabble with hatching eggs. If your kids are just dying to make an incubator and try and hatch some eggs, this one is perfect. It is easy enough for kids to help and not ruin anything.
The cardboard and the thin plastic wrap are not going to be much of an insulation for heat, so I see a low success rate with this incubator.
With No Electricity
This tutorial is for an incubator that does not use electricity. It is very simple to set up and you probably have everything at home all ready to make this.
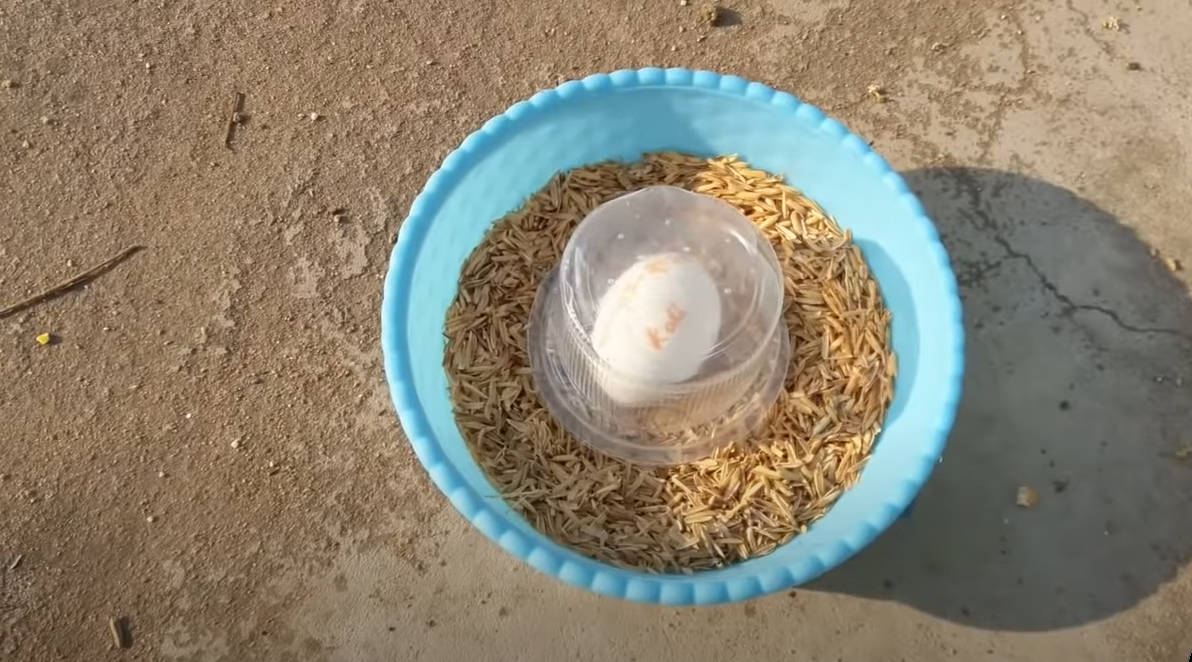
Opinion: This seems more like a science experiment than an actual incubator. The video shows that they did hatch an egg, so who knows. It seems to me that it would be hard to regulate the temperature, but maybe with enough trial and error you can make it work. If you had bigger containers, you could probably hatch more than one egg as well.
Custom Built In
This tutorial is probably my favorite. This, to me, looks like the closest to a commercially produced product you will get in a homemade incubator.
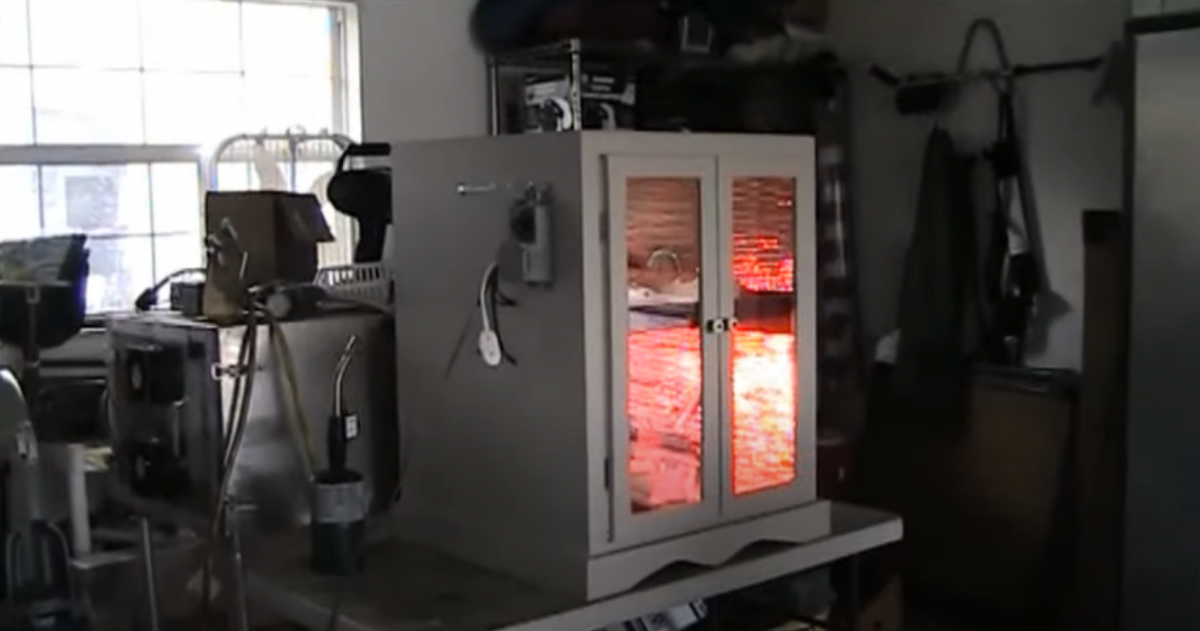
Opinion: This homemade incubator is the most difficult of the group to make. The tutorial does not show her actually installing all of the components. But I think as she describes what she put in there, it would be easy enough to make a list and then be able to replicate it. You might have to rewind several times to get a good view of each piece.
This is a homemade incubator you can keep in the garage and not feel embarrassed. Its not an odd looking cooler with wires dangling out like a bomb. I like it.
What homemade incubator are you going to build for you backyard chickens? I know my spring to do list just got a little bit longer. Make sure you click the share button and tell your friends what one you liked. Remember, sharing is caring and helps us keep growing here at BackyardChickensHQ.com